
30 May 2025
Hands up if you’re not quite sure how to iron clothes?
Or why we should even bother?
About 30% of 18 to 34 year-olds do not actually own an iron and “never iron their clothes”, ¹ so if you’re one of this 30% our smol how-to guide will have you ironing like a pro in no time.
Because freshly ironed clothes don’t just look better… they can also harbour less germs and bacteria! Who knew? Apparently, the heat from the iron can kill microorganisms that may still be present after washing.² Sounds like a bonus.
step 1: prepare your ironing space.
Before you dive into wrinkle-free clothes, you’ll need a sturdy surface. If you have an ironing board, great! If not, a table or work surface and thick cotton towel will do the trick.
Now, heat up your iron. This should only take a couple of minutes.
TOP TIP: Check your clothing label to ensure your item is safe to iron.
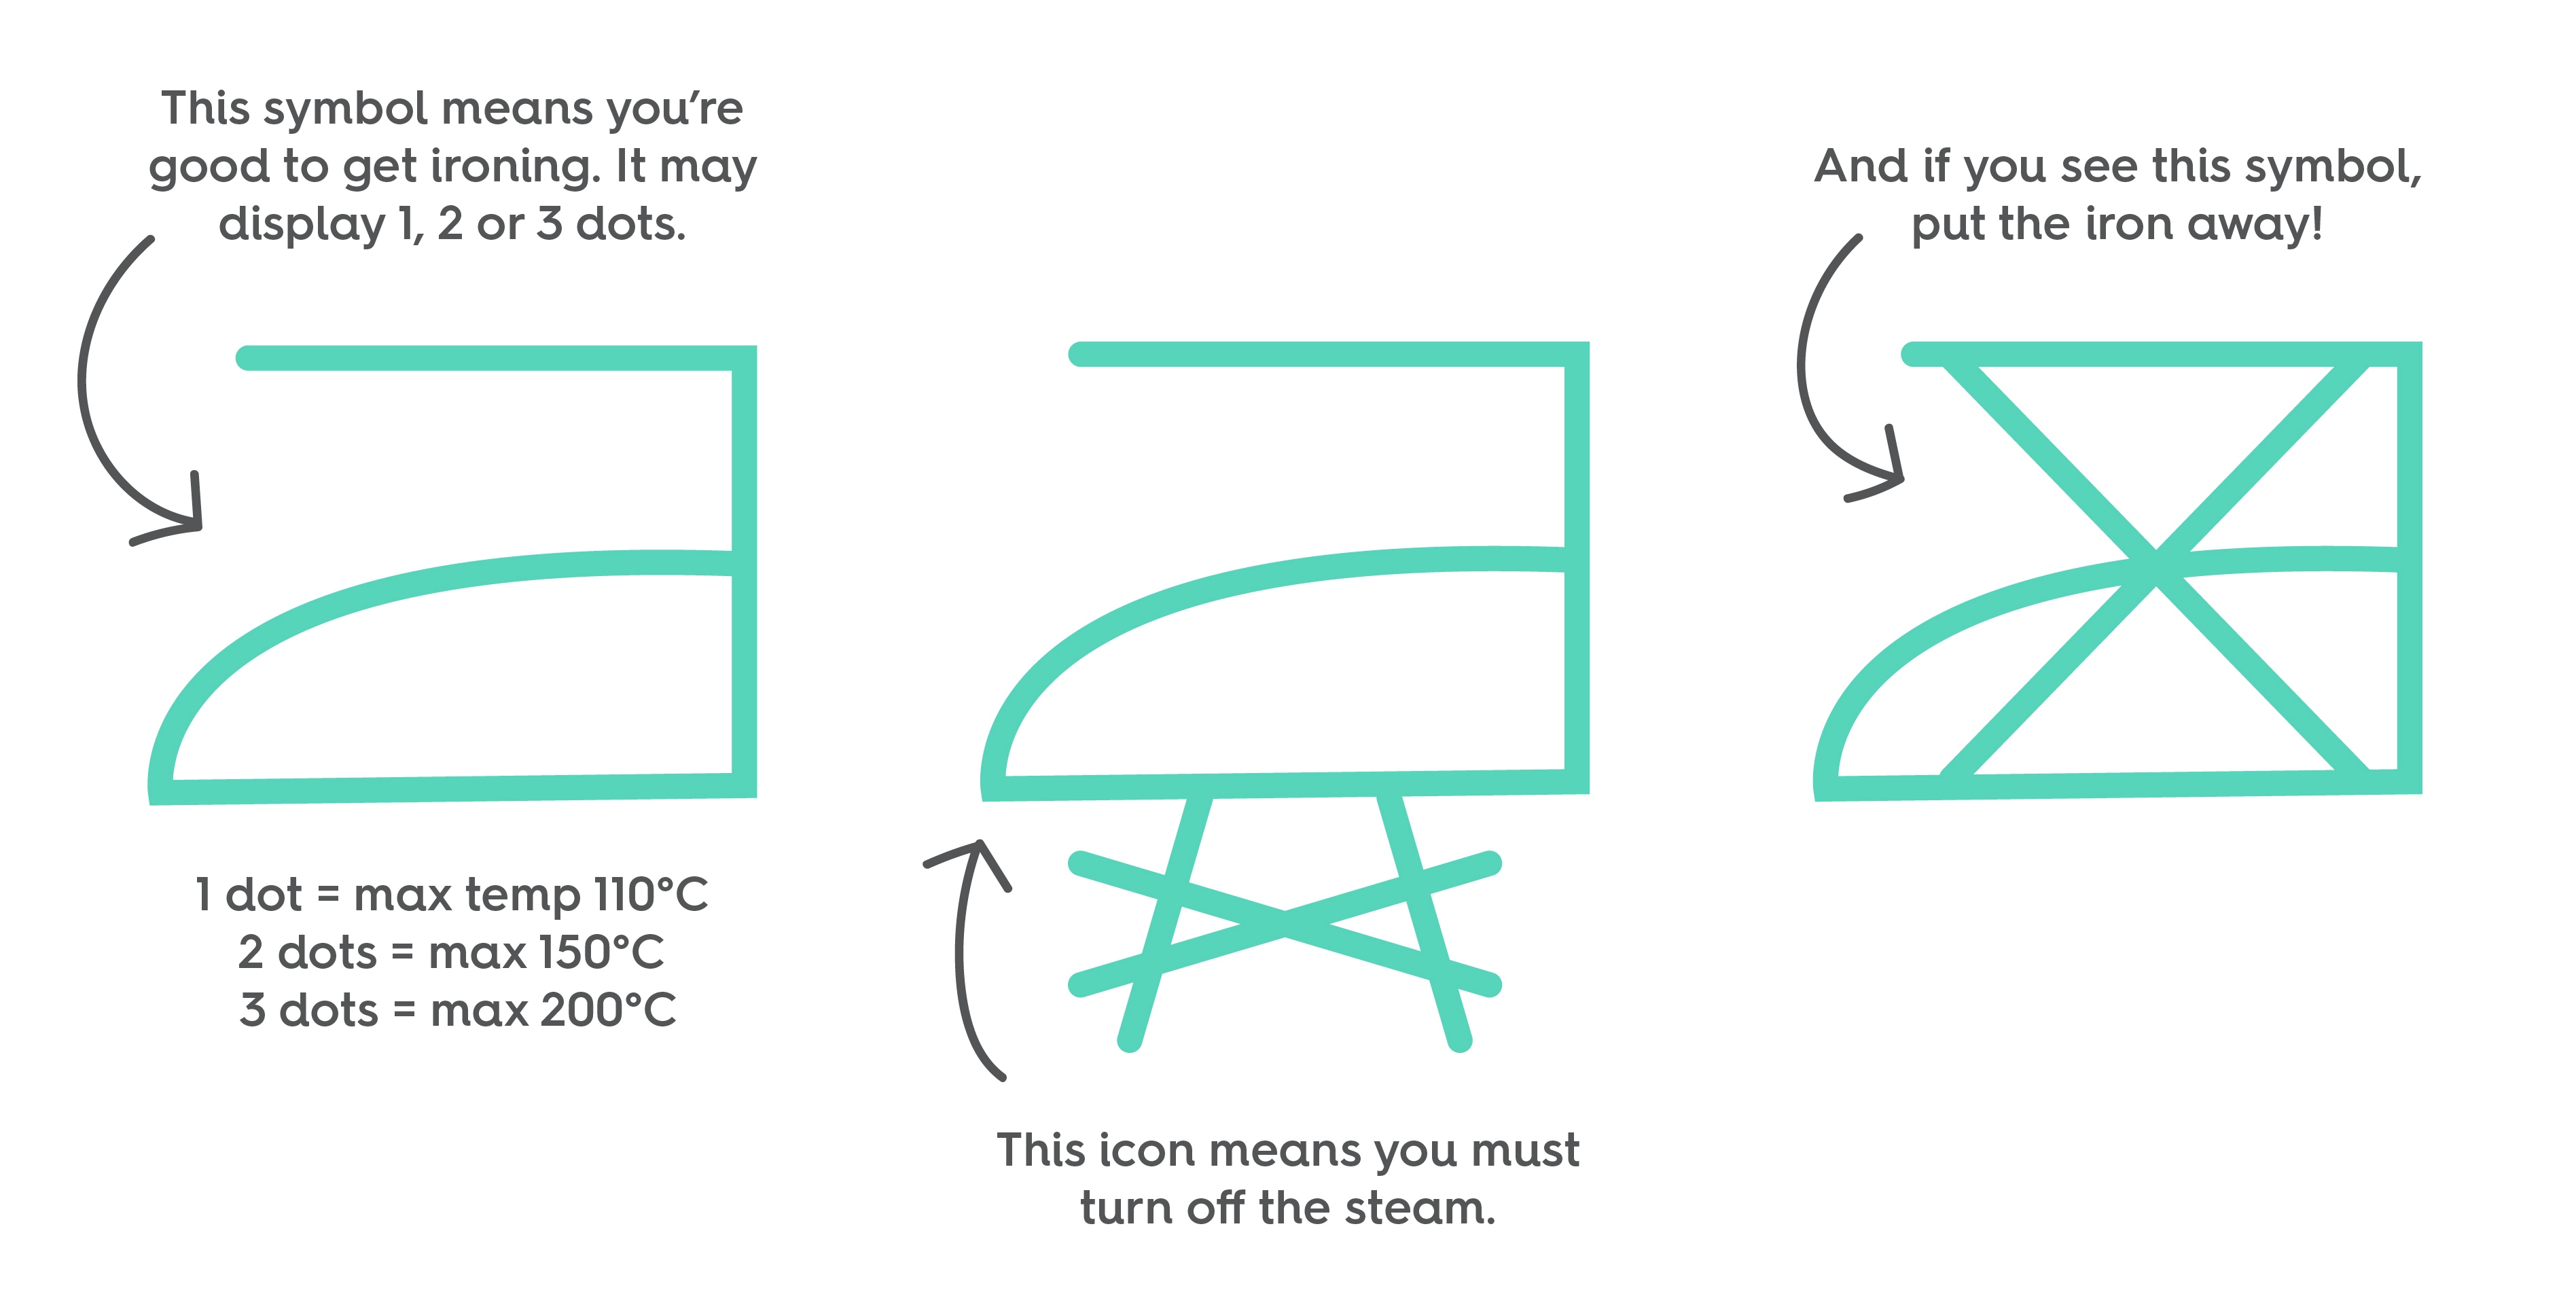
This temperature cheat sheet can also help with your iron settings…
Synthetics like nylon & acrylics need a low setting (135°C)
Polyester, silk and wool require a medium heat (150°C)
Cotton & linen will need a high temperature (200°C)
step 2: moisture magic.
Interestingly, a little moisture makes it much easier to iron out those creases so try to iron your clothing while it’s still a little damp. If your clothes have already completely dried, a light spritz of water or a dash of steam from your iron will do wonders.
You can even add a little starch to the water if you want that crisp, just-from-the-dry-cleaner look.
TOP TIP: If you’re ironing delicates like silk, iron on the wrong side of the fabric o avoid any unwanted shine. For textured fabrics like corduroy, this also prevents crushing the texture.
step 3: trousers & skirts.
For trousers, always start from the bottom and work your way to the top. Want sharp creases? Fold, press, and voila!
Skirts? Same deal, work from the bottom to the top. If the skirt has pleats? Secure them with a paperclip and press from the top down.
step 4: shirts, hems, and collars.
Shirts can be tricky, but you’ve got this.
Start with the sleeves, moving from cuff to shoulder. Then tackle the body (both front and back).
For collars, cuffs and hems, start on the inside and finish on the outside.
Avoid ironing over buttons or zippers. Melted decoration is not a good look.
handy good-to-knows…
- Caught the fabric? The iron might be too hot. Lift it, lower the temp, and try again.
- Scorch marks on your clothes? Act fast with a little laundry liquid or white vinegar and cool water you should life any marks out easily.
- Burn marks on the iron itself? Wait until the iron has completely cooled down and then clean the plate with a paste of bicarbonate of soda and vinegar.
- Always unplug the iron when you’re done and keep cords out of reach.
- Never iron clothing with sequins, rhinestones, velvet, and screen-printed designs.
So… now you’re ready to conquer the ironing board with confidence. Happy ironing!
¹ Annual Trends Report Lakeland 2023
² National Institute of Health